Daily Usage
The side panel at a glance
Click the Quick Dialer icon in your Chrome toolbar to open the side panel on the right side of your browser. The panel has three tabs:
| Tab | Purpose |
|---|---|
| FOUND | Phone numbers detected on the current web page (count shown in tab) |
| CALL LIST | Your dialing queue (count shown in tab) |
| SETTINGS | Connection and preferences |
Adding numbers to your call list
Works on most CRMs, dashboards, and HTML-based pages.
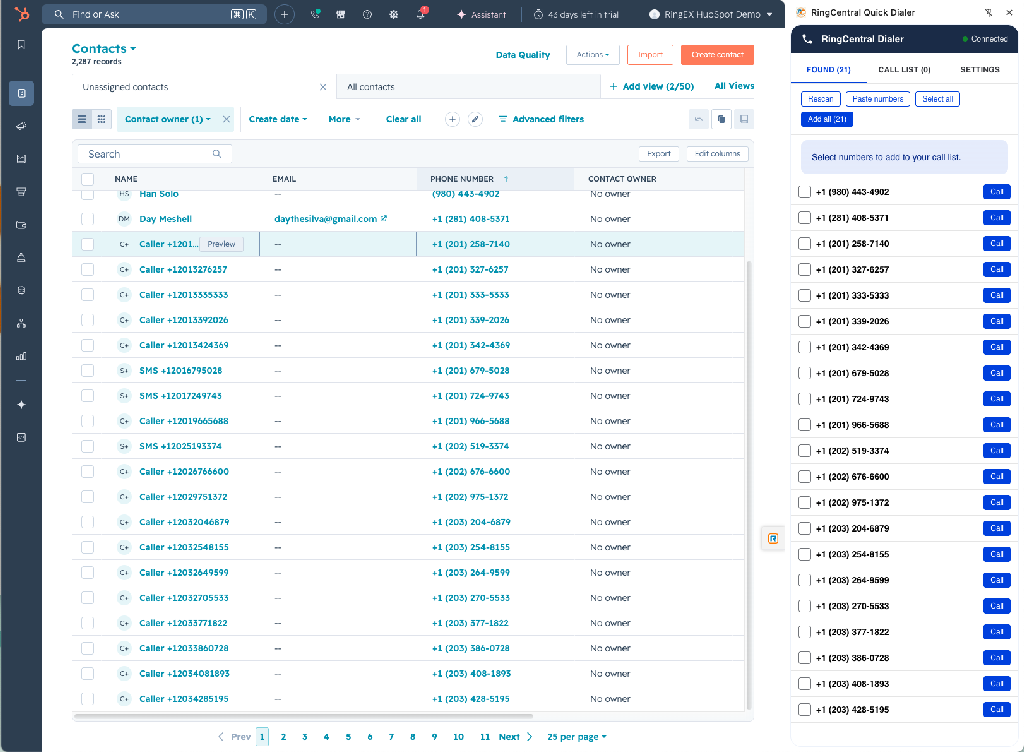
- Navigate to a page containing phone numbers (e.g. a HubSpot contact list).
- Open the side panel and select the FOUND tab — the extension automatically scans the visible page and lists every phone number it detects, formatted as
+1 (555) 123-4567. - Use the checkboxes on the left to pick the numbers you want, or click Select all.
- Click Add to call list to send your selection to the call list.
- Or click the blue Call button next to any individual number to dial it immediately.
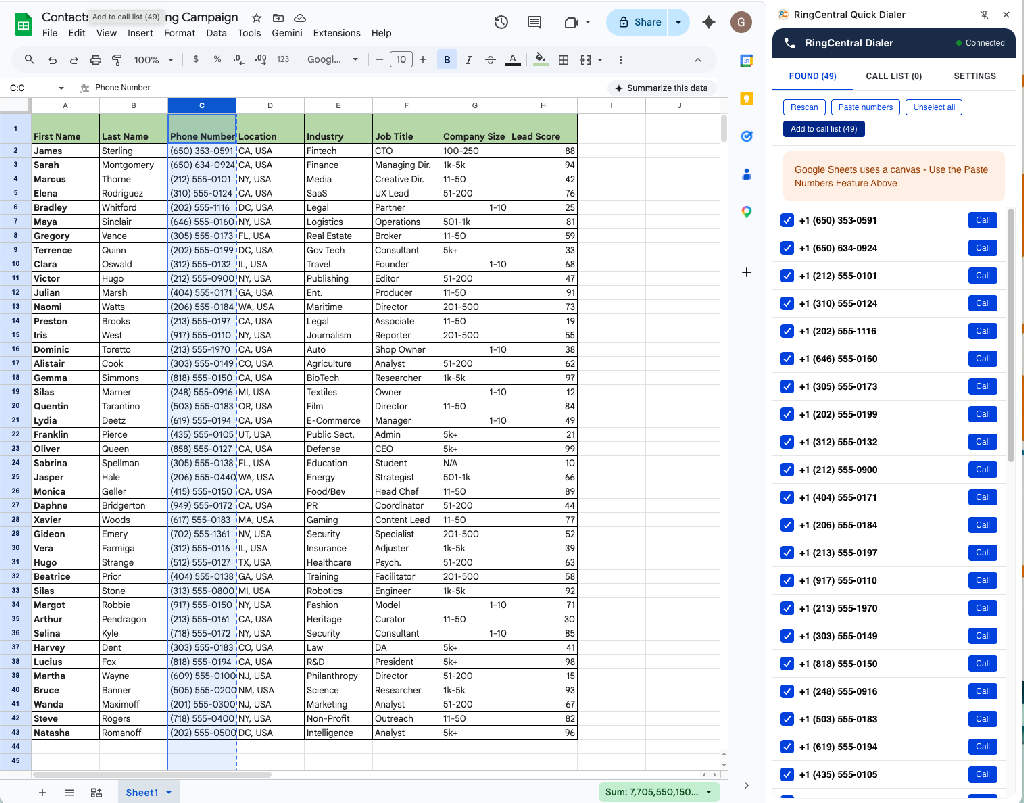
Google Sheets renders data on a canvas, so the extension can't scrape it directly. Use the Paste numbers feature instead.
- In your spreadsheet, select the column of phone numbers and copy ([+C] / [Ctrl+C]).
- Open the side panel and go to the FOUND tab.
- Click Paste numbers, paste your list into the box, and confirm.
- The extension normalizes every number to E.164 format and lists them in the Found tab.
- Click Add to call list to queue them up.
In the CALL LIST tab, type a number into the input field and press Add.
Working with your call list
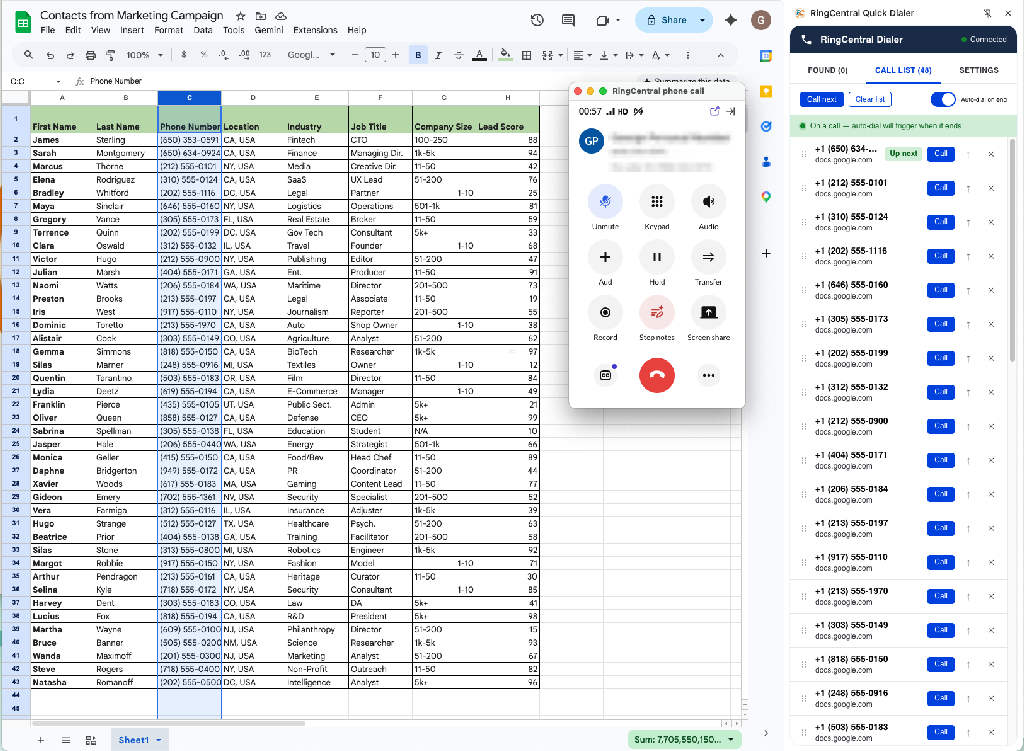
Switch to the CALL LIST tab to manage and dial your queue.
- Up next — the first item is highlighted with a green "Up next" pill. This is the number that will be dialed when you click Call next or when auto-dial fires.
- Reorder — drag any row by its grip handle (the dots on the left) to change the order. The "Up next" pill follows the top of the list.
- Source — each row shows where the number came from (e.g.
docs.google.com) so you don't lose context. - Remove — click the × on the right side of any row.
- Clear list — empties the entire call list.
- Auto-dial toggle — flip the blue switch to enable or disable auto-dial without changing your interval.
Dialing a call
You have three ways to start a call:
- Call next button — dials the top item in the call list.
- Call button on any row — dials that specific number.
- Call button in the Found tab — dials immediately without queueing.
When you click dial, the extension opens the RingCentral phone in a background tab and starts the call automatically. Your current tab stays focused so your workflow isn't disrupted.
Watching the call status
The extension polls RingCentral and shows a live status indicator at the top of the panel:
| Status | Meaning |
|---|---|
| Ready | No active call; safe to dial |
| Ringing | Outbound call is connecting |
| On a call | Conversation in progress (green) |
| Wrapping up | Call ended; auto-dial timer running (amber) |
Auto-dial on hangup
When a call ends and your call list still has numbers in it:
- The status switches to Wrapping up with a countdown.
- After your configured delay, the next number is dialed automatically.
- To skip the delay, click Call next during the countdown.
- To cancel the auto-dial, flip the auto-dial toggle off, or set the delay to Off in Settings.